How to Enter DFU Mode of Your iOS Device
iPhone Data Recovery allows you to directly scan your iPhone 5/4S, iPad 2, the new iPad, iPad with Retina display and iPod touch 5 (only for text contents), iPhone 4 (GSM & CDMA), iPhone 3GS, iPad 1 and iPod touch 4 to recover lost data like contacts, photos, videos, messages, notes, etc. If you’ve ever used it or you’re using it now, you must know it that you need to enter the scanning mode of the device first before you perform the scan and recovery. To some people, it’s an easy job, but to others, it’s not. This time, let’s talk about how to enter the scanning mode of the device successfully at one time.
Actually, there're two ways for you to access the scanning mode of the iOS device. You can do it according to the guide displaying on the window of iOS Data Recovery, after connecting your device. Or you can do it by yourself with your device and leave alone the program.
Enter the scanning mode of the device with iPhone Data Recovery running
After running iPhone Data Recovery tool and connecting your device, you’ll get the window as follow (taking iPhone 4 as an example).
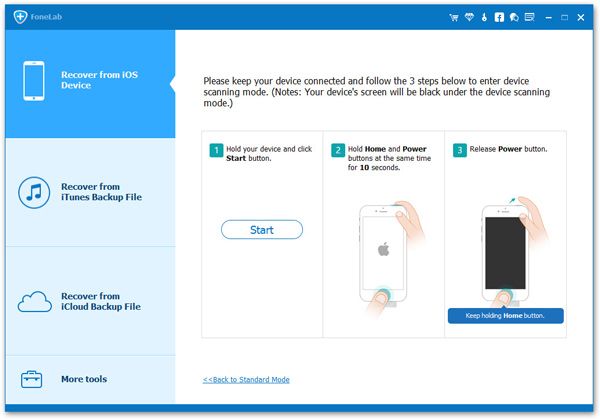
Now follow the steps in the window to begin entering the scanning mode.
- Step 1. Hold your device, then click the green "Start" button;
- Step 2. After clicking the "Start" button, press the "Power" and the "Home" at the same time immediately for exact 10 seconds. The program will count the time for you.
- Step 3. When the 10 seconds passed, release the "Power" button right now, but keep pressing the "Home" for another 10 seconds.
- Step 4. You’ll be informed that you’ve successfully entered the scanning mode of the device after another 10 seconds, and you can release the "Home" button then.
Tried several times and still can’t get into the scanning mode of the device? Don’t worry. You can try another way.
Enter the scanning mode of iOS devices without iPhone Data Recovery running
Note: Don’t run iPhone Data Recovery on your computer at first.- Step 1. Connect your device to the computer;
- Step 2. Press the "Power" and the "Home" at the same time, and count for 10 seconds in your mind;
- Step 3. Then release the "Power" button right now, but keep pressing the "Home" for another 10 seconds;
- Step 4. Now, release the "Home" button and run iPhone Data Recovery on your computer, and you’ll get the window below;
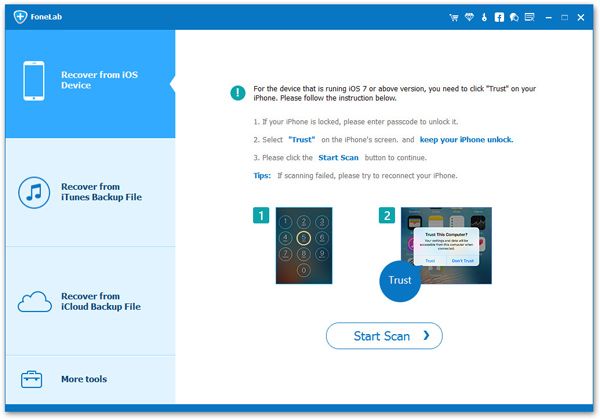
When you get into the scanning mode of the device successfully, iPhone Data Recovery will start scanning your device for lost data now.