Contents:
Below is the detailed guide of how to recover lost data from your iOS devices, including contacts, messages, notes, call logs, photos, videos, Reminders, Voice memos, Voicemail, and more. The operation will be a little different based on different iOS devices. Do choose the one for your device and follow it to recover your lost data.
First things first: You'd better set your device into the flight mode once you realized that you've mistakenly deleted or lost important data, and don't use your device for anything like syncing with iTunes, because any operation on your device like sending/receiving messages, making/answering calls, etc. can overwrite your lost data and make it unrecoverable.
iOS Data Recovery for Mac allows you to directly scan your device to find data, like contacts, messages, call history, Calendar, notes, Reminder, Safari bookmark, WhatsApp conversions, Camera Roll, Photo Library, Photo Stream, Voice memos and voicemails, recently deleted from your iPhone 4/3GS, iPad 1 or iPod touch 4.
After downloading iOS Data Recovery for Mac, install and run it on your computer. Then you can connect your device and the window of the program will show as follows.
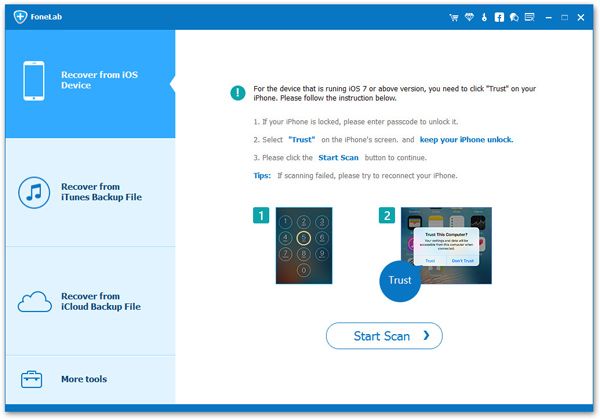
Note: If you use iPhone 3GS, iPad 1 or iPod touch 4, you need to get a plug-in first, and the program will automatically do it for you when you’re here. Just let it finish.
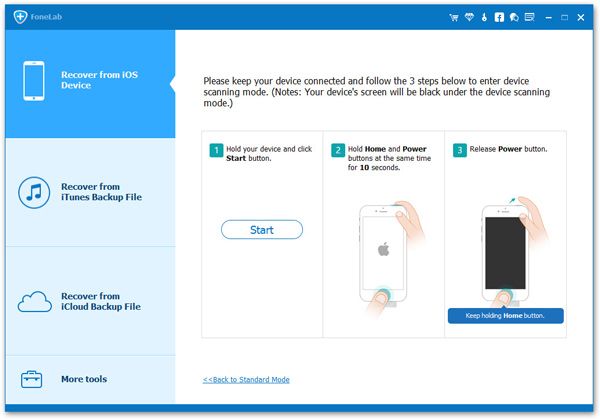
To scan your device for data on it, you need to access the device’s scanning mode first. You can follow the way below to do it:
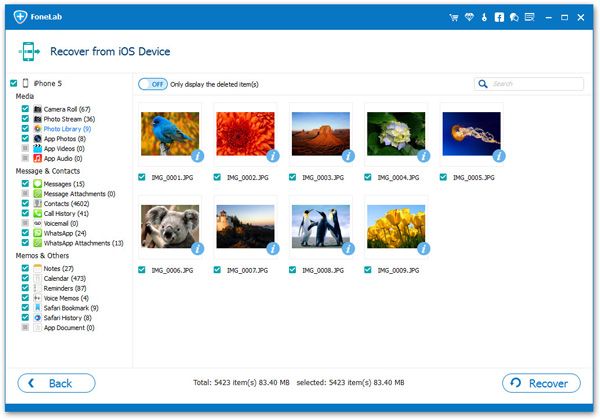
After the scan, all recoverable data on your device will be found and displayed in the scan result in clear categories like Camera Roll, Photo Stream, Photo Library, Contacts, Messages, and more. You can preview all of them and tick off those you want to save them on your Mac by clicking "Recover".
For iPhone 14 Pro Max/Pro/Plus/13 Pro/13 Pro Max/13 Mini/12 Pro/12 Pro Max/12 Mini/11/11 Pro/XR/XS/XS Max/X/8/8 Plus/7/7 Plus/6S/6S Plus/6/6 Plus/5S/5C/5/4S, iPad with Retina display, iPad mini, The New iPad, iPad 2 and iPod touch 5 users, iOS Data Recovery for Mac lets you directly scan the device and recover lost messages, contacts, notes, call logs, WhatsApp conversation, Calendars, Reminders and Safari bookmarks. As to Camera Roll, message attachments, WhatsApp conversation attachments, Photo Library, Photo Stream, Voice memos and Voicemail, you can backup existing ones on your device to a Mac.
After launching the program, connect your device to the Mac. When the program detects your device, you’ll see the window below.
Unlike iPhone 4/3GS, iPad 1 and iPod touch 4, you can directly click "Start Scan" on the window above to scan your device and find data on it.
When the scan is finished, you can check all found data in the scan result generated by the program, such as photos, contacts, messages, notes, call log, whatsApp conversations, and more. Select what you want back and click "Recover" to save them to your Mac with one click.
When your device is not at hand, or you just only want to access your iTunes backup and get some data selectively, you can choose this recovery mode. It allows you to extract contacts, messages, call history, Calendar, notes, Reminder, Safari bookmark, WhatsApp conversions, Camera Roll, Photo Stream, Voice memos and Voicemails.
After running iOS Data Recovery for Mac on your computer, click Recover from iTunes Backup Files on the top of the main window, and then you’ll see the window below.
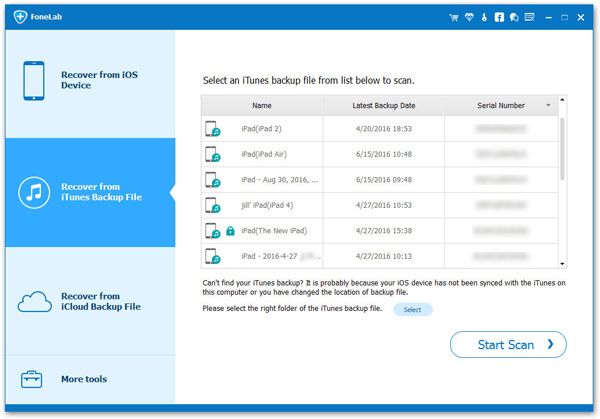
Here, all iTunes backup files on your computer will be immediately found and displayed on the window. Choose the one for your device and click Start Scan to extract the content out of it.
Note: If there are more than one iTunes backup files for your device, choose the one with the latest date. You can also extract all the iTunes backup files one by one when you have a need.
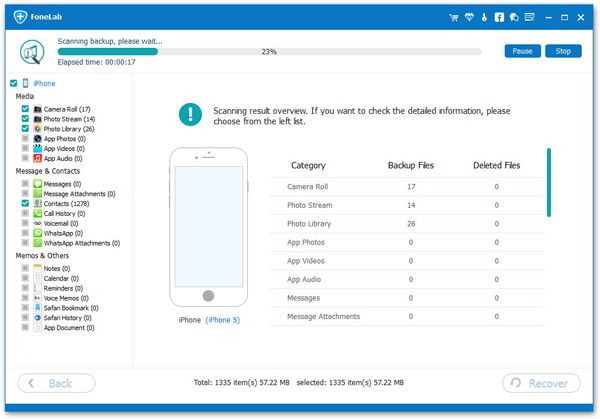
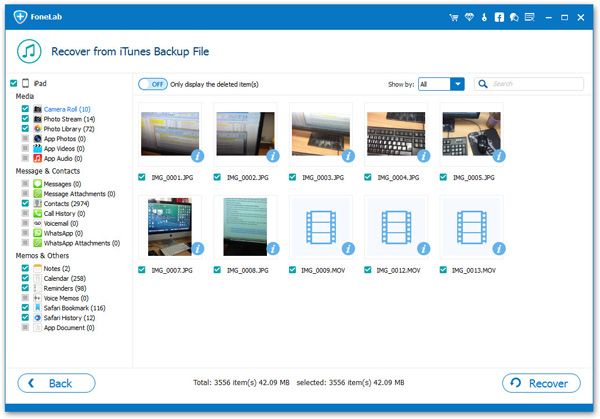
When the scan is completed, you can preview all the contents in detail by clicking the categories one after one. Mark those you want and click the "Recover" button to save them on your Mac.

Mobile Transfer is a powerful phone to phone data transfer tool lets you seamlessly copy data between Android,...
Simple and easy to use Mac Data Recovery software to help you recover photos, videos, documents, email and arc...

iPhone Data Eraser is the best data eraser software to get your device started with a clean slate when you pla...
Copyright © 2023 iphone-data-recovery.com. All Rights Reserved.

