How to Transfer Music from iPhone to Computer in 4 Ways
Assuming you are an avid music lover, you may have hundreds of songs on your iPhone. And of course, sometimes you need to move media between your iPhone and computer. If you have a lot of songs on your iPhone, you may need to back up the songs to your PC, or copy them to your computer for use and sharing. iTunes supports iPhone users to synchronize data, but the actual data transfer is restrictive and complicated. Since iTunes only supports users to transfer purchased music, when you want to transfer non-purchased music to a computer or want to transfer music from iPhone to Windows PC, iTunes does not support it. Don’t worry, this guide will tell you how to transfer music from iPhone to computer in 4 different ways. You are able to transfer your data with/without iTunes.
Way 1. How to Move Music from iPhone to Computer with iTunes
If you want to move the music purchased from the iTunes store on your iPhone to your computer, you can use this method. It should be noted that the disadvantage of this method is that it only supports music downloaded from the iTunes store or Apple Music, and does not support any third-party music applications, so you cannot use this method to move any unpurchased music to your computer.The steps of how to transfer purchased music from iPhone to computer with iTunes:
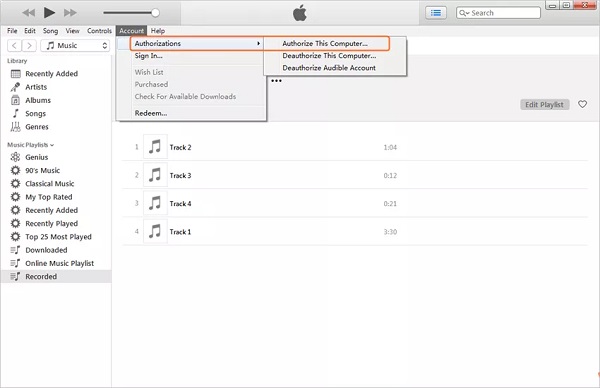
1. Download, install and launch iTunes on your computer.2. Enter Account >Authorizations > Authorize This Computer.
3. Choose 'Authorize' to authorize your computer to play purchased music of iTunes Store.4. Connect your iPhone to computer via USB cable.
5. When an interface appears asking if you want to transfer the purchased content to your computer, click Transfer Purchase. If this interface does not pop up on the screen, go to File> Devices> Transfer Purchase from iPhone.
Way 2. How to copy music from iPhone to computer via Apple ID
This method is suitable for purchased music, not for unpurchased music. If the songs you want to transfer from iPhone to computer are purchased, you can directly use the same Apple ID to re-download the purchased music in the iTunes Store without connecting the iPhone to the PC.Step 1. After running iTunes, find "Account" from the menu bar.
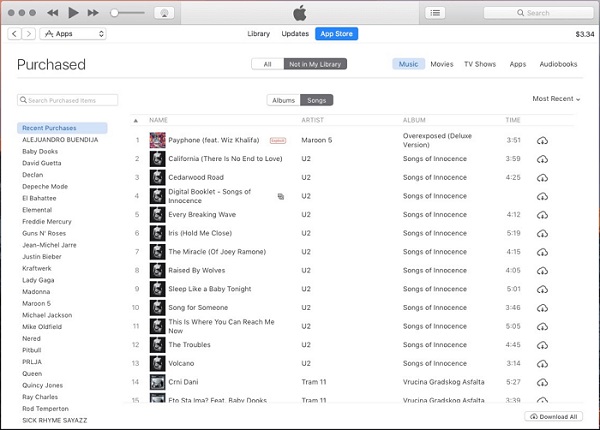
Step 2. "Log in" with the same Apple ID that you used to purchase iPhone music.Step 3. Find "Account"> "Purchased"> "Music".
Step 4. After switching to the "Not in My Library" tab, you can see the purchased items of your Apple ID.Step 5. Click the cloud download button to download and save the song to your computer.
Way 3. How to Transfer Music from iPhone to Computer with iPhone Data Recovery app
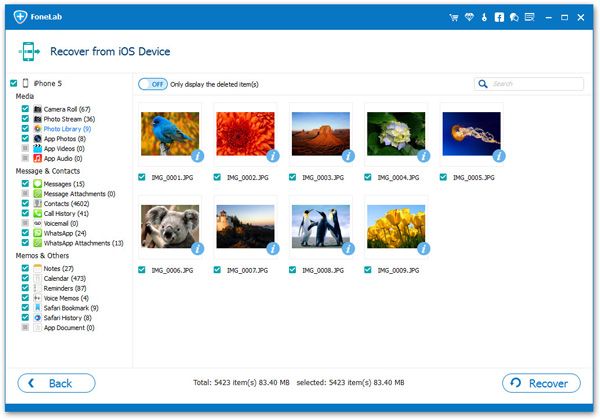
As you can see, using iTunes to transfer data brings a lot of complexity and limitation, and it is not an ideal way to copy a lot of music from iPhone to computer. If you want to experience selectively transferring iPhone data, whether it is music, photos, videos or other multimedia data, to your computer, iPhone Data Recovery is an ideal choice.This app provides a 100% safe and reliable solution to move your data from iPhone, iPad, iPod to computer. Not only can you preview and choose to transfer the existing data in your iPhone, you can also scan and export accidentally deleted data from your phone to computer.
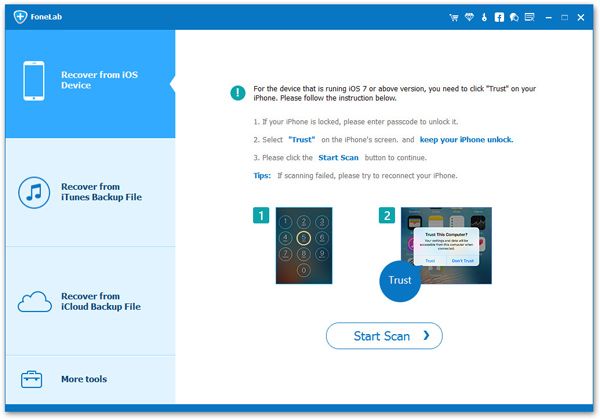
Step 1. Download and install the iPhone data recovery software on your computer, launch it and tap "iPhone Data Recovery" feature on the homepage, the software will to to default mode "Recover from iOS Device". Using a usb cable to connect iPhone to the software, press "Trust" on iPhone screen, the software will detect iPhone, then you can click "Start Scan" button to begin scan iPhone internal memory.


Way 4. How to Move Music from iPhone to Computer with iPhone Data Transfer app
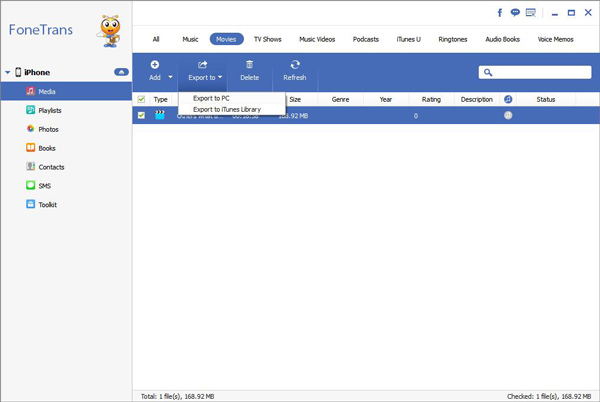
Thanks to iPhone Data Transfer app, getting various types of data files from iPhone/iPad/iPod to your computer is a super simple process. iPhone Data Transfer performs far more than a music transfer app for moving photos from iPhone to computer, but also other data and files like photos videos, apps data, call logs, contacts, etc. In addition to being able to preview and select your iPhone's data before transfer, more importantly, this process is 100% safe and will not leak or overwrite any of your data.
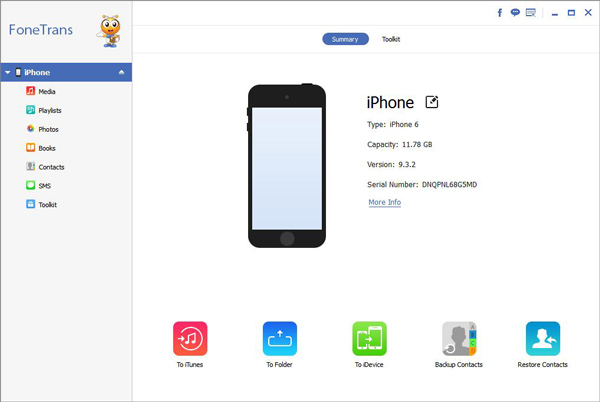
Step 1. Run the iPhone data transfer software on computer and install it, finish the setup process and launch it, you will see the main screen. Link your iPhone to the computer and press "Trust" to left iPhone trust this PC, the software will detect it and show it’s interface on the screen.