How to Transfer Photos from iPhone XR/XS (Max) to Computer
More and more people like to shoot photos and post it on facebook or twitter when they are traveling in new country, having great feast in fancy restaurant or doing exciting sport like skiing. In the meanwhile, people can share all happiness or trouble with their friends, family or maybe strangers in Internet. However, people sooner realize problem come along with. They don’t have enough space to save photos. Or sometimes because of careless, phone users may be delete their data by accident. Before it happen, we need to move data to our computer.
Since iPhone users value their data a lot, we try our best to find the best of software for you. iPhone Transfer, magical program, can easily copy or move your photos, music, contacts, SMS and more to your computer. iPhone Transfer promises that the files you copy to computer are totally the same as source ones. Plus its function are various. This time, we show you how to transfer photos from iPhone to PC with two easy steps. Convenient and effective!


How to sync photos from iPhone XR/XS (Max) to computer
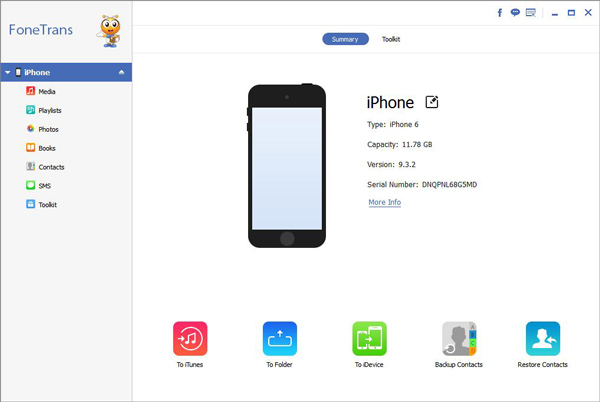
Step 1. Launch Transfer Program
No doubt that first thing we should do is download and settle down iPhone Transfer software. Next, we need to connect iPhone to computer as usual. And we need to check if it connected well. Few seconds later, a main window will come up as stample below.
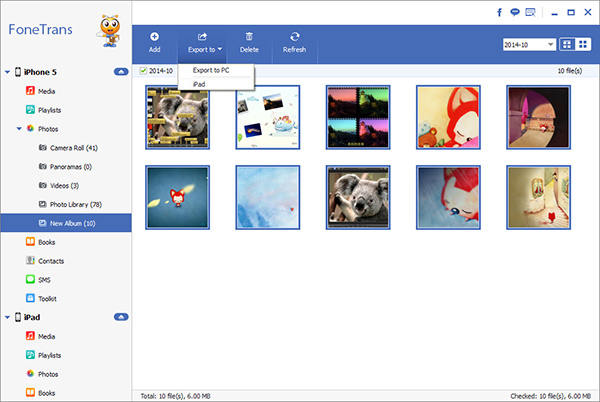
Step 2. Select and Transfer Photos
Here we go to the key point --- choose and transfer. You will see the left of sidebar, find "Photos Library" or "Camera Roll" which saved your photos before. Open them and check photos you want to move to your computer. At last, one simple click "Export to". A small window will pop up, choose the path you gonna save in computer.