4 Methods to Transfer Files from Mac to iPad
It is a common need to transfer data between different Apple devices. You may want to transfer files from Mac to iPad for different reasons, such as convenient viewing, editing, backup, sharing, etc. It is essential to find a suitable way to transfer your files. Different ways of transferring data are shown on the Internet. In this post, we share 4 safe and effective ways for you to transfer files from Mac to iPad. Which method you choose depends on your specific requirements for data transfer, such as transfer speed, data type, data size, etc. Read on and choose the best method you can use.
Part 1. How to Transfer Files from Mac to iPad Using iCloud Drive
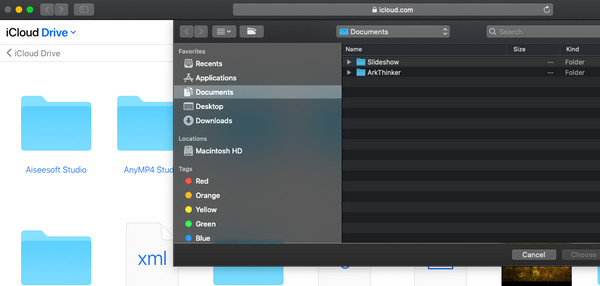
As for transferring documents wirelessly, iCloud Drive allows users to keep their documents and files constantly updated on all of their Apple devices. iCloud only offers 5GB of free storage, so if you have a lot of files to store or transfer, you'll need to pay for more storage.Step 1. Open iCloud.com on your Mac browser app and sign in with your Apple ID.
Step 2. Click on the iCloud Drive icon in the options. Then, click the upload icon in the menu tab.Step 3. View and select all the files you want to transfer from your iPad.
Step 4. Check your transferred files from your Files app while signed in to the same Apple ID account you use on your Mac.
Part 2: How to Transfer Files from Mac to iPad via Airdrop
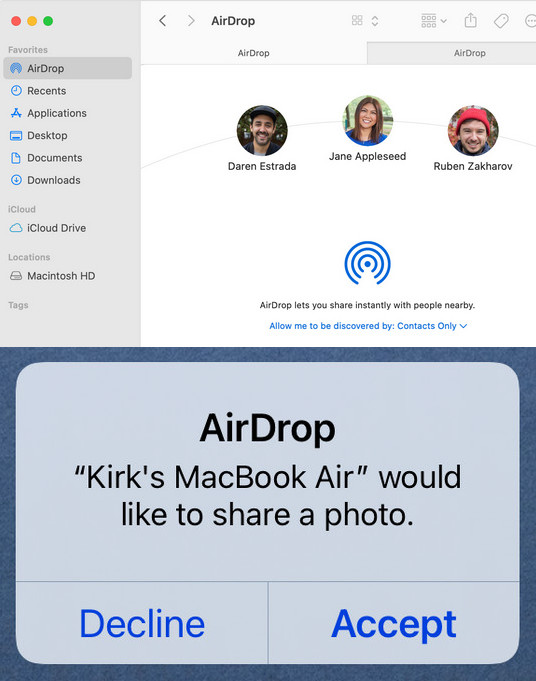
Airdrop is an Apple service and built-in feature that allows users to quickly send and receive media files wirelessly. Using AirDrop from a Mac to an iOS device requires all devices to be close to each other, with Bluetooth and wi-fi enabled. They must support AirDrop (all modern hardware does).You must enable AirDrop on the device that will receive the file or image, then select the file from your Mac to send and access AirDrop to send it to the receiving iOS device.
Step 1. Go to Control Center to turn on Airdrop for iPad. Tap and hold Wi-Fi to see the Airdrop option to turn it on. And enable Wi-Fi and Bluetooth.Step 2. Open Airdrop for Mac, click Go from the menu tab, and select Airdrop from the list. Enable Wi-Fi and Bluetooth and make sure you can see your iPad from nearby devices.
Step 3. View and select the files you want to transfer from Mac to iPad and drag them onto the iPad's name or icon.Step 4. Go to your iPad and click the accept option to let the device receive the transferred file.
Part 3: How to Transfer Files from Mac to iPad via iTunes/Finder
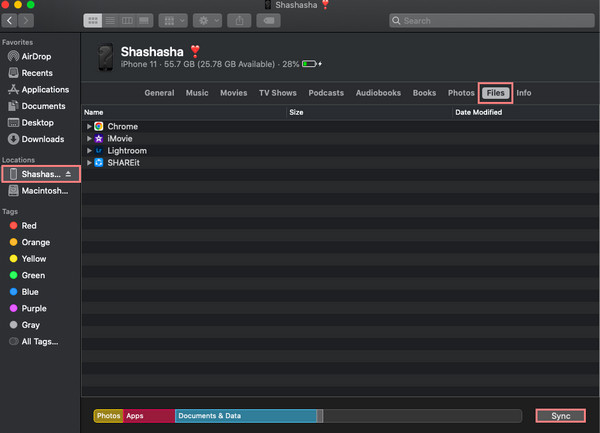
Apple supports transferring files between iOS and Mac devices via iTunes/Finder. Note that if you have an older version of macOS, you can still access iTunes. For new macOS version users, iTunes has been replaced by Finder, but the steps for their file transfer process are all similar. Follow the steps to transfer files from Mac to iPad via Finder or iTunes. In addition to transferring files, you can also use them to transfer photos, calendars, contacts, and more.Step 1. Open iTunes/Finder on your Mac. In iTunes click the device icon in the tab. Or click the iPad's name in the Finder.
Step 2. Check and select the file types which you want to transfer or sync on iTunes. Then click Files On your Mac.Step 3. Click the Sync button.
Part 4: How to Transfer Files from Mac to iPad with iOS Data Transfer
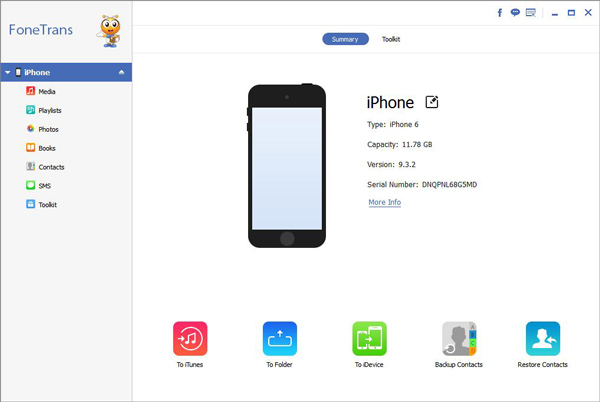
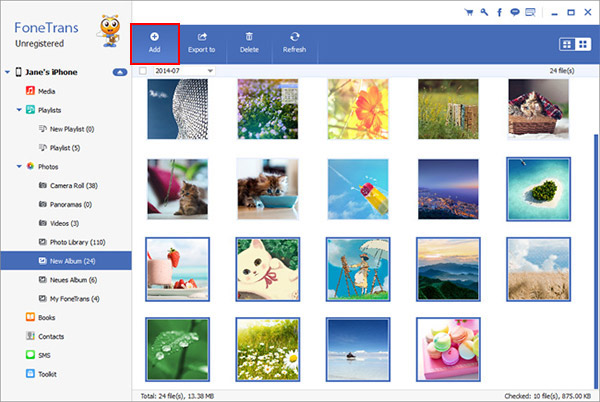
iOS Data Transfer is a professional and versatile tool for iPhone/iPad/iPod touch users to transfer different kinds of data types between iDevice and computer, including photos, videos, contacts, messages, music, app data etc. It is easy for you to transfer files from Mac to iPad, and vice versa.There are no complicated steps, you only need to follow the prompts of the iOS Data Transfer software interface, and you can complete the data transfer from Mac to iPad in a few simple steps.
Step 1. Download, install and launch iOS Data Transfer on your Mac.Step 2. Link your iPad to the Mac and unlock iPad, press "Trust" on iPad screen, the software will detect iPad, you can see iPad info on the screen.