How to Selectively Recover Lost Notes from iPad Directly
With Notes on iPad, you can jot down important events, capture quick flashes of inspiration, create checklists, and more. Support to pin the main memo, and add attachments such as photos, videos, or web links. Documents can also be scanned, copied, or sent to others. If you add people to a specific note, you can also make the latest changes visible to everyone. If you use notes with iCloud, you can also keep notes updated across all your devices. iTunes and iCloud are two great tools for you to make use of to back up iPad data. If you're used to creating valuable information in your iPad's notes, you can restore it from a backup when you delete the note by accident. If you've ever tried to solve the problem of recovering deleted data from an iPad without backup, or you just want to export specific files from iTunes and iCloud backups instead of the entire backup, you probably know that it's not an easy job to do.
In this guide, I will show you the solution to handle this problem properly. The operation method is very simple, even if you are a novice, you can follow the steps to recover lost data. We recommend you a professional tool designed to recover iOS data, whether your device is iPad, iPhone, or iPod touch. This software called iOS Data Recovery is not only a tool that provides three modes for you to recover data, but also a tool to effectively back up iOS data to a computer selectively. This is a versatile ios tool for you to recover many kinds of deleted data, including photos, music, videos, app data, messages, voice mails, voice memos, etc, not limited to notes. Whether you choose to restore from iTunes and iCloud backup, or directly scan your iOS device, you can directly preview and select the data you need to restore, and export all data, which can save you time managing data.If you are wondering how to recover deleted notes from the iPad freely, you can refer to the contents in the following part. The data on your iDevice will be kept safe when you are using this software to restore or transfer data.


Selectively Restore Deleted Notes from iPad Without Backup
Step 1. Choose recovery mode
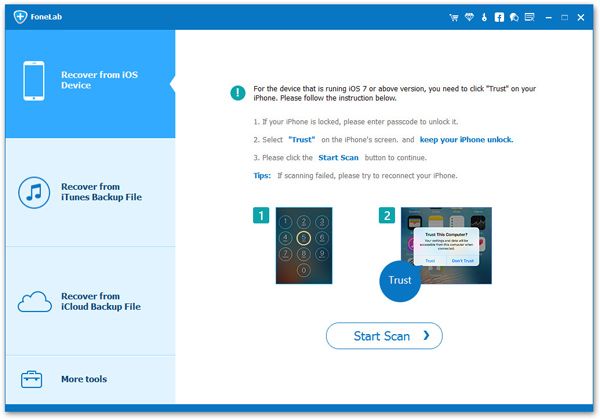
Run the iOS data recovery program on your computer after you install it, there are four features display on the windows, choose the feature of "iPhone Data Recovery", the software will go to default mode "Recover from iOS Device". Using a usb cable to connect your iPad to the software, unlock your iPad and press "Trust" on iPad screen, you can see some iPad info, you can click "Start Scan" button to scan iPad internal memory.
Step 2. View and restore notes
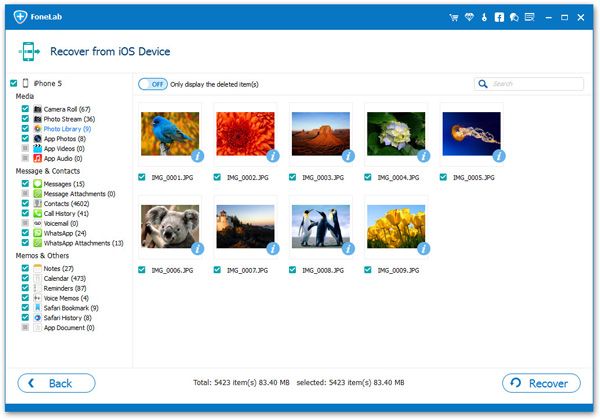
The software will take some time to scan iPad storage, it will list all data type on left sidebar, including notes, videos, app audios, contacts, messages, whatsapp, wechat, viber, kik, line and others, you can tap "Notes" and preview all notes in detail on the right after the software finish the scanning process, you can switch "Only display the deleted item(s)" to show erased notes, mark all notes you want and click "Recover" button to get notes back.
Free to Back Up iPad Notes to Computer without iTunes
Step 1. Choose backup mode
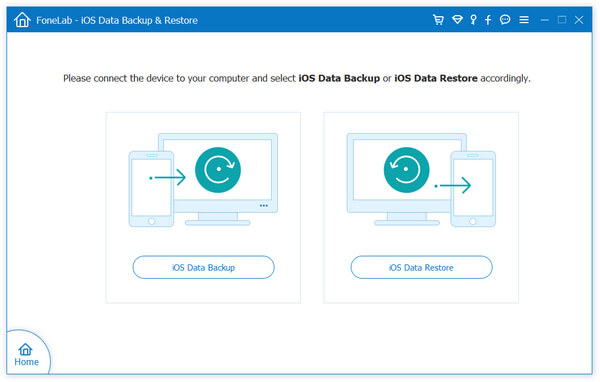
Run the iOS data recovery software on computer and select the feature of "iOS Data Backup & Restore", then you will see two modes on the screen, choose "iOS Data Backup". Link your iPad to the computer and the software will detect your iPad after iPad trust this PC.
Step 2. Choose notes to backup
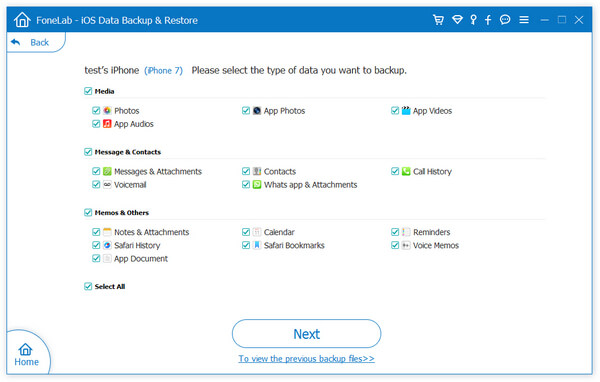
In the new windows, you can see many data type to backup, you can mark "Notes & Attachments" and untick other data type, then click "Next".
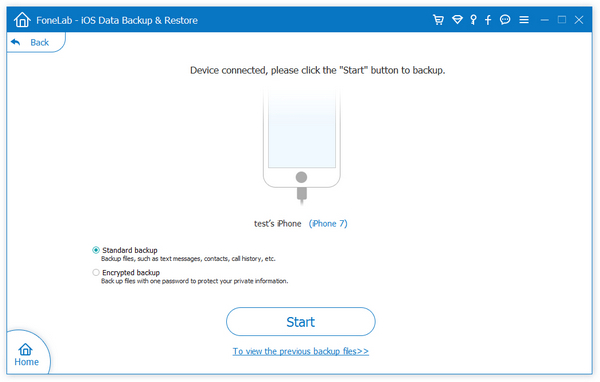
Step 3. Choose the form of backup
The software will choose the "Standard Backup" for your backup, for "Encrypted Backup", you can set a password for backup. If you need, you can choose it.
Step 4. Back up notes
Choose a target folder and start to save all notes and attachments to computer for free.


